There’s something timeless about the aroma of fresh bread baking in the oven—a scent that fills your kitchen with warmth and comfort. But what if you could have all the satisfaction of homemade bread without the laborious kneading? The Best No-Knead Sandwich Bread is the ultimate solution—a golden, soft, slightly chewy loaf that requires almost no effort. It’s the perfect everyday bread for toast, sandwiches, or simply slathering with butter and jam. This recipe delivers bakery-quality results using simple ingredients and a slow, hands-off process that even beginners can master.
Why You’ll Love This Recipe
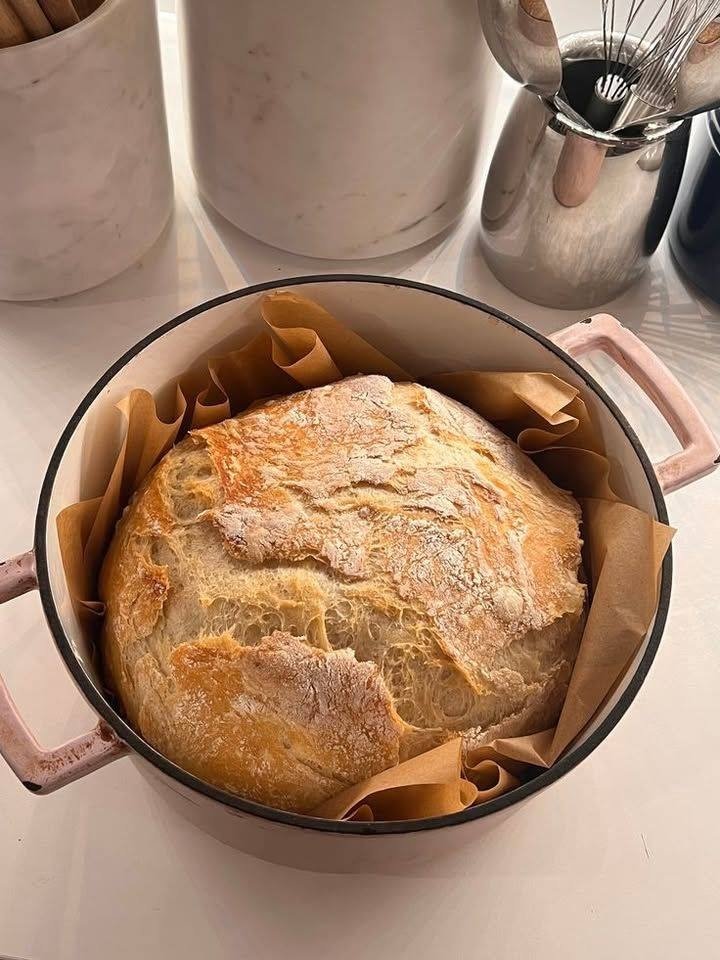
This bread stands out for its simplicity and flavor. No mixer, no special equipment—just a bowl, a spoon, and patience. The long fermentation time allows the dough to develop deep, yeasty notes and a rich, buttery texture. The crust bakes up beautifully golden and thin, while the interior stays moist, airy, and soft enough for any type of sandwich. Unlike typical artisan no-knead breads that are rustic and crusty, this version is fine-crumbed and tender—ideal for slicing.
Ingredients
-
3 ½ cups (440g) all-purpose flour (or bread flour for a slightly chewier texture)
-
1 ¼ teaspoons salt
-
2 tablespoons sugar
-
2 ¼ teaspoons (1 packet) instant yeast
-
1 ¼ cups (300ml) warm water (about 100°F/38°C)
-
2 tablespoons melted butter or olive oil
-
¼ cup milk (optional, for a softer texture)
-
Extra butter for brushing (optional)
Step-by-Step Instructions
Step 1: Activate and Combine
In a large mixing bowl, whisk together warm water, sugar, and yeast. Let it sit for 5 minutes until a light foam appears on top—this means your yeast is active. Next, pour in the melted butter (or oil) and milk if using.
In a separate bowl, mix the flour and salt together. Slowly add the dry ingredients into the wet mixture, stirring with a wooden spoon or spatula until no dry flour remains. The dough will be shaggy, sticky, and loose—that’s exactly what you want.
Step 2: The Long Rest (Fermentation)
Cover the bowl tightly with plastic wrap or a damp towel and let it rest at room temperature for 8 to 12 hours (overnight works best). During this time, the yeast will slowly ferment the dough, developing incredible flavor and structure. You’ll notice the dough will double in size and be full of bubbles when ready.
Step 3: Shape the Dough
Once the dough has risen, lightly grease your hands and a clean work surface. Turn the dough out gently—it will be very soft and slightly sticky. Fold the edges inward toward the center a few times to tighten its shape. Form it into a rough rectangle that fits your loaf pan.
Grease a 9×5-inch loaf pan and place the dough inside, smoothing the top with your fingertips. Cover loosely with plastic wrap and let it rise again for 45 to 60 minutes, or until it puffs up about 1 inch above the rim of the pan.
Step 4: Bake to Perfection
Preheat your oven to 375°F (190°C) while the dough finishes its second rise. Place the loaf pan in the center of the oven and bake for 35 to 40 minutes, or until the top is deep golden brown and the loaf sounds hollow when tapped.
If you have a thermometer, the internal temperature should reach 195–200°F (90–93°C).
For a softer crust, brush the hot loaf with melted butter immediately after removing it from the oven. Let the bread cool in the pan for 10 minutes, then transfer it to a wire rack to cool completely before slicing.
Step 5: Slice and Enjoy
Once cooled, slice with a serrated bread knife to reveal a tender, uniform crumb. The flavor is buttery, slightly sweet, and deeply satisfying—perfect for sandwiches, French toast, or even grilled cheese. Store the loaf in an airtight container at room temperature for up to 4 days, or slice and freeze for later use.
Tips for the Perfect No-Knead Sandwich Bread
-
Use the right flour: All-purpose flour yields a soft crumb, while bread flour gives a chewier texture. A mix of both offers the best of both worlds.
-
Don’t rush fermentation: The slow rise develops the bread’s structure and flavor. Cooler rooms may take longer—up to 16 hours.
-
Moisture matters: The dough should be sticky. Too dry, and it won’t rise properly; too wet, and it may collapse. Add flour or water a tablespoon at a time to adjust.
-
Boost flavor: Swap some of the water for milk, or add a tablespoon of honey for a touch of sweetness.
-
Crispy vs. soft crust: For a crustier loaf, bake uncovered as is. For a soft crust, brush with butter and cover the cooling loaf with a clean towel.
Why No-Knead Works
Traditional bread-making relies on kneading to develop gluten, the protein structure that traps gas and gives bread its rise. In this recipe, time replaces elbow grease. The long rest allows gluten to form naturally through enzymatic activity. That’s why this dough, though barely handled, produces a strong yet soft structure. It’s a brilliant example of letting chemistry and patience do the work for you.
Variations to Try
-
Whole Wheat Version: Replace 1 cup of all-purpose flour with whole wheat flour and add 1 tablespoon of honey for moisture.
-
Herb Loaf: Mix in 1 teaspoon each of dried rosemary and thyme for a fragrant twist.
-
Garlic Butter Bread: Brush the dough before baking with a mix of butter, minced garlic, and parsley for a savory sandwich loaf.
-
Seeded Bread: Sprinkle sesame, poppy, or sunflower seeds on top before baking for crunch and nutrition.
Serving Ideas
This no-knead sandwich bread complements both sweet and savory flavors:
-
Toast slices and spread with peanut butter and banana for breakfast.
-
Build a hearty turkey and cheese sandwich with crisp lettuce and tomato.
-
Grill with butter for the ultimate golden-brown grilled cheese.
-
Cube it for homemade croutons or savory bread pudding.
Final Thoughts
The Best No-Knead Sandwich Bread is proof that homemade baking doesn’t have to be intimidating. With just a few pantry staples and a little patience, you can create a loaf that rivals any bakery’s offering. Its soft texture, mild flavor, and ease of preparation make it a staple recipe for both beginners and seasoned bakers. Whether you’re making toast in the morning or packing lunch for the day, this bread elevates every bite.
