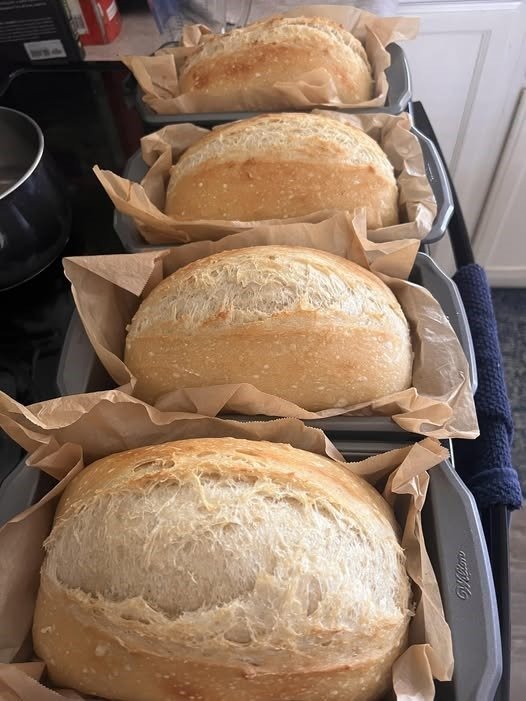
There’s nothing quite as satisfying as slicing into a warm loaf of homemade sourdough sandwich bread — its soft, slightly tangy crumb and golden crust make every bite pure comfort. Unlike rustic sourdough boules, this version is made to be light, tender, and perfect for sandwiches, toast, or grilled cheese. It combines the depth of traditional sourdough flavor with the soft structure of classic sandwich bread, resulting in a versatile loaf that’s both hearty and pillowy. Let’s explore how to make this bakery-quality bread right in your kitchen.
Ingredients
-
1 cup (240g) active sourdough starter (fed and bubbly)
-
1 ½ cups (360ml) warm water (around 80°F / 27°C)
-
1 tablespoon honey (or sugar)
-
3 tablespoons unsalted butter, softened (or olive oil for dairy-free)
-
4 cups (480g) bread flour (you can replace ½ cup with whole wheat flour for extra flavor)
-
1 ½ teaspoons salt
Instructions
1. Activate the Starter
Before mixing the dough, make sure your sourdough starter is active and bubbly. Feed it 4–8 hours before baking so it’s at its peak activity when you use it. A quick test: drop a small spoonful of starter into a bowl of water — if it floats, it’s ready to use.
2. Mix the Dough
In a large mixing bowl, combine the active sourdough starter, warm water, and honey. Stir until the starter is mostly dissolved. Add the softened butter and mix briefly. Then, add the flour and salt. Using a wooden spoon or your hands, mix until a shaggy dough forms. The dough will look rough at first, but don’t worry — it will smooth out during the rest period.
3. Autolyse (Rest the Dough)
Cover the bowl with a damp towel and let it rest for 30 minutes. This rest period allows the flour to fully hydrate, making the dough easier to knead and resulting in better gluten development.
4. Knead the Dough
After resting, turn the dough onto a lightly floured surface. Knead it for about 8–10 minutes until it becomes smooth and elastic. You can also use a stand mixer fitted with a dough hook for about 6 minutes on medium speed. The dough should be soft but not sticky — add a little flour if necessary, but avoid adding too much, as it can dry out the loaf.
5. Bulk Fermentation (First Rise)
Place the dough into a lightly greased bowl, cover it with plastic wrap or a damp towel, and let it rise at room temperature for 4–6 hours, or until it has doubled in size. The exact time depends on the temperature of your kitchen and the strength of your starter. During this rise, the sourdough’s natural fermentation develops flavor and structure.
If your kitchen is cool, you can extend the rise time. For convenience, you can also place the dough in the refrigerator overnight to slow-ferment and develop a deeper sour flavor.
6. Shape the Loaf
Once the dough has doubled, gently punch it down to release any air bubbles. Turn it onto a lightly floured surface and shape it into a rectangle. Roll it up tightly from the short end (like a jelly roll), pinching the seam closed. Tuck in the sides to create a smooth loaf shape.
Place the shaped dough into a greased 9×5-inch loaf pan, seam side down. Cover loosely with a towel or plastic wrap.
7. Final Proof (Second Rise)
Allow the dough to rise again for 2–4 hours, or until it’s about 1 inch above the rim of the pan. This is called the “proofing” stage — be patient and avoid rushing it. A well-proofed loaf will yield a soft and airy crumb once baked.
To test readiness, gently press a finger into the dough: if it springs back slowly and leaves a slight indentation, it’s ready to bake.
8. Bake the Bread
Preheat your oven to 375°F (190°C). Once hot, place the loaf in the center rack and bake for 35–40 minutes, or until golden brown. The internal temperature should reach about 190°F (88°C).
If the top browns too quickly, loosely cover it with foil halfway through baking.
When done, remove the bread from the oven and let it cool in the pan for 10 minutes. Then, transfer it to a wire rack to cool completely before slicing — this helps the crumb set properly and prevents a gummy texture.
Serving Ideas
This sourdough sandwich bread is as versatile as it is delicious. It’s perfect for:
-
Breakfast toast topped with butter and jam or avocado.
-
Classic sandwiches, from BLTs to grilled cheese.
-
French toast, where the sourdough tang enhances the sweet custard.
-
Croutons or breadcrumbs when the loaf is a few days old.
Storage Tips
Keep your bread fresh by wrapping it in a clean kitchen towel or storing it in a bread box at room temperature for up to 3 days. For longer storage, slice and freeze it in an airtight bag — it toasts beautifully straight from the freezer. Avoid refrigerating fresh bread, as it tends to dry out faster.
Baker’s Tips
-
Hydration matters: If your dough feels too sticky, resist adding too much flour; instead, use a bench scraper to handle it.
-
Flavor control: For a stronger sour flavor, refrigerate the dough overnight before shaping.
-
Soft crust: Brush the warm loaf with melted butter right after baking for a golden, tender crust.
Conclusion
Homemade sourdough sandwich bread is more than just a baking project — it’s a ritual of patience and reward. Each loaf reflects care, time, and the magic of natural fermentation. With its pillowy crumb and delicate tang, this bread transforms everyday meals into something special. Whether you’re a seasoned baker or new to sourdough, this recipe brings the warmth of artisanal bread to your kitchen — one slice at a time.
