If you grew up loving the sweet, flaky goodness of Pop-Tarts, but now follow a gluten-free lifestyle, this homemade recipe is your dream come true. These gluten-free Pop-Tarts feature a tender, buttery crust and are filled with your favorite jams, chocolate, or cinnamon sugar mixture — all topped with a simple glaze. They’re nostalgic, delicious, and far better than anything from a box. Whether you’re making them for breakfast, dessert, or a special treat, these pastries deliver the perfect balance of texture and flavor — crisp on the outside and soft inside.
Ingredients
For the Buttery Gluten-Free Pastry Dough:
-
2 cups gluten-free all-purpose flour blend (with xanthan gum included)
-
1 tablespoon granulated sugar
-
½ teaspoon salt
-
1 cup (2 sticks) unsalted butter, cold and cubed
-
1 large egg
-
2 tablespoons ice-cold water (add more if needed)
-
1 teaspoon apple cider vinegar or lemon juice
For the Filling:
-
½ cup fruit jam or preserves (strawberry, raspberry, or blueberry work beautifully)
-
OR ½ cup Nutella, chocolate spread, or cinnamon-sugar butter mix
For the Egg Wash:
-
1 egg, beaten with 1 tablespoon milk
For the Glaze (Optional but Recommended):
-
1 cup powdered sugar
-
1–2 tablespoons milk or cream
-
½ teaspoon vanilla extract
-
Sprinkles or crushed freeze-dried fruit for decoration (optional)Step 1: Make the Gluten-Free Buttery Dough
In a large mixing bowl, whisk together the gluten-free flour, sugar, and salt. Add in the cold butter cubes and, using a pastry cutter or your fingertips, work the butter into the flour until the mixture resembles coarse crumbs. You want small pea-sized bits of butter still visible — that’s the secret to a flaky crust.
In a small bowl, whisk the egg, cold water, and apple cider vinegar together. Gradually add the liquid to the flour mixture, stirring until a soft dough begins to form. Gluten-free dough can be slightly crumbly, so gently knead it with your hands until it just comes together. If it feels too dry, add another teaspoon or two of cold water.
Form the dough into two discs, wrap each in plastic wrap, and chill in the refrigerator for at least 30 minutes. Chilling allows the butter to firm up, giving your Pop-Tarts that perfectly crisp, buttery texture once baked.
Step 2: Roll Out the Dough
Once chilled, place one dough disc between two sheets of parchment paper to prevent sticking. Roll the dough out to about ⅛-inch thickness. Using a ruler or knife, cut the dough into rectangles roughly 3×4 inches — the traditional Pop-Tart size. Repeat with the second disc until you have matching tops and bottoms.
If your kitchen is warm and the dough softens too much, return it to the fridge for a few minutes before continuing. Working with chilled dough makes assembly much easier.
Step 3: Fill and Seal the Pop-Tarts
Line a baking sheet with parchment paper and preheat your oven to 375°F (190°C).
Place half of the dough rectangles on the prepared sheet — these will be the bottoms. Spoon about 1 tablespoon of filling into the center of each rectangle, leaving about ½ inch of space around the edges. Be careful not to overfill; too much filling can cause leakage during baking.
Brush the edges lightly with the egg wash, then place another dough rectangle on top. Press around the edges gently with your fingers, then crimp with a fork to seal completely. The crimping not only ensures the filling stays inside but also gives that signature Pop-Tart look.
Use a fork to poke a few small holes in the top of each tart — this allows steam to escape and prevents puffing.
Step 4: Bake to Golden Perfection
Brush the tops with the remaining egg wash for that lovely golden color. Bake for 22–25 minutes, or until the Pop-Tarts are golden brown and the edges look crisp.
Remove from the oven and let them cool on the baking sheet for about 10 minutes, then transfer to a wire rack to cool completely before glazing. If you glaze them while too warm, the icing will melt right off.
Step 5: Make the Sweet Glaze
In a small bowl, whisk together the powdered sugar, milk, and vanilla extract until smooth and slightly thick. Adjust the consistency by adding a few drops of milk if needed — you want it to be spreadable but not runny.
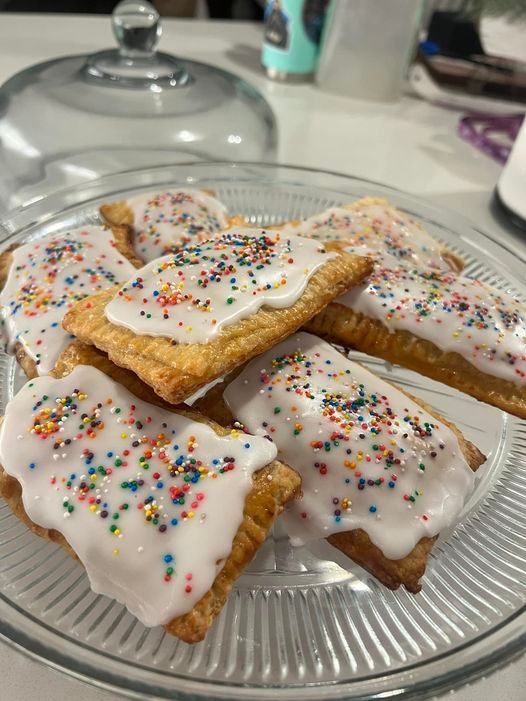
Once the Pop-Tarts are cool, spoon or drizzle the glaze over the tops. You can also dip the tops for a more uniform look. For a fun touch, add sprinkles or a dusting of crushed freeze-dried fruit while the glaze is still wet. Allow them to set for at least 15 minutes before serving.
Step 6: Serve and Store
Your gluten-free buttery Pop-Tarts are now ready to enjoy! Serve them warm or at room temperature with a cup of coffee or a cold glass of milk.
Store any leftovers in an airtight container at room temperature for up to 3 days, or refrigerate for up to a week. You can also freeze unglazed Pop-Tarts for up to 2 months; just reheat in the oven or toaster before glazing and serving.
Tips for Success
-
Choose a good gluten-free flour blend: A 1:1 baking flour with xanthan gum ensures a cohesive, flaky dough.
-
Keep ingredients cold: Cold butter and water are key to achieving a crisp, layered crust.
-
Don’t skip the chill time: The dough needs to rest so the fats solidify and prevent spreading.
-
Be gentle: Gluten-free doughs can be delicate — handle them carefully and use parchment paper to make rolling easier.
-
Customize your fillings: Try blueberry jam with lemon glaze, Nutella with sea salt, or even a savory version with cheese and herbs.
Conclusion
These homemade gluten-free Pop-Tarts with a buttery crust are everything you love about the classic treat — flaky, golden, and irresistibly sweet, but without the gluten. They’re perfect for breakfast on the go or as a nostalgic dessert that’s fun to make and share. Once you bite into that tender crust and taste the warm, gooey filling, you’ll never want store-bought Pop-Tarts again.
