There is something incredibly satisfying about making cheese at home. Not only do you get the freshest, creamiest product possible, but you also get to enjoy the process of transforming simple ingredients like milk, lemon juice, or vinegar into something rich, flavorful, and versatile. Homemade cheese is surprisingly simple to make and doesn’t require any complicated equipment. With just a few kitchen staples, you can create a delicious cheese that works well in sandwiches, salads, curries, or simply eaten on its own with a sprinkle of salt.
This recipe is for a fresh, soft cheese similar to paneer or ricotta. It is mild in flavor, tender in texture, and an excellent base for countless dishes.
Ingredients
To make about 1 pound of homemade cheese, you’ll need:
-
1 gallon (about 3.8 liters) of whole milk – fresh, full-fat milk is best
-
1/4 cup lemon juice or white vinegar (both work as a curdling agent)
-
1 teaspoon salt (optional, but enhances flavor)
-
Cheesecloth or a clean cotton kitchen towel
-
A colander and large pot
Step-by-Step Instructions
Step 1: Heat the Milk
Pour the gallon of whole milk into a large, heavy-bottomed pot. Place it over medium heat and stir occasionally to prevent the milk from scorching at the bottom. Slowly bring the milk to a gentle boil. This process usually takes 15–20 minutes. As the milk heats, you may see steam rising and small bubbles forming along the edges. Keep an eye on it, as milk can boil over quickly once it reaches its peak temperature.
Step 2: Add the Acid
Once the milk comes to a gentle boil, turn the heat down to low. Add the lemon juice or vinegar, a tablespoon at a time, stirring gently after each addition. Within seconds, you’ll notice the milk separating into curds (solid white chunks) and whey (a thin, greenish-yellow liquid). If the milk doesn’t fully curdle, add a little more lemon juice or vinegar until the separation is complete.
Step 3: Strain the Curds
Line a colander with cheesecloth and set it over a large bowl or sink. Carefully pour the curdled milk into the colander, allowing the whey to drain out. Be careful, as the liquid will be hot. Gather the corners of the cheesecloth and tie them into a bundle. Hang the bundle over the sink or on a faucet handle to let the remaining whey drip out for 30–60 minutes. The longer you drain, the firmer the cheese will become.
Step 4: Rinse and Press
If you used vinegar, you may want to rinse the curds briefly with cold water while still in the cheesecloth to remove any residual tanginess. After draining, place the cheese bundle on a flat surface and set a heavy object (like a skillet or a few cans) on top. This helps press out excess moisture and shape the cheese into a block. Leave it pressed for 1–2 hours.
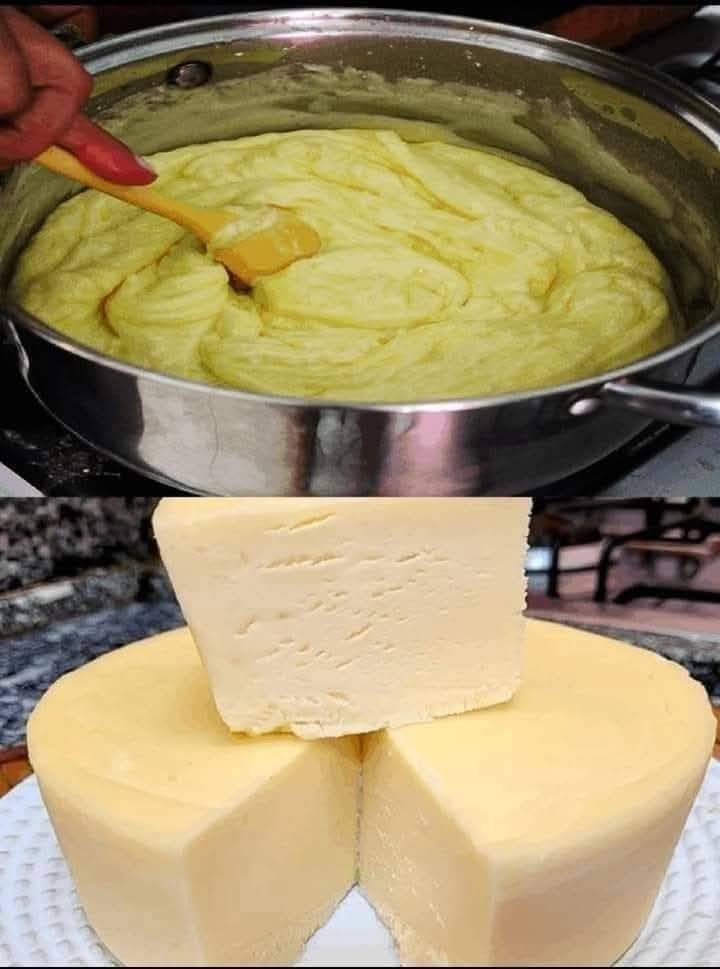
Step 5: Unwrap and Store
After pressing, unwrap the cheesecloth to reveal your homemade block of cheese. At this point, you can cut it into cubes for cooking or crumble it for salads and spreads. Store the cheese in an airtight container in the refrigerator. It will stay fresh for up to 5 days.
Tips for Success
-
Choose quality milk: Fresh whole milk gives the richest and creamiest results. Avoid ultra-pasteurized milk, as it doesn’t curdle well.
-
Experiment with acids: Lemon juice gives a light, citrusy note, while vinegar creates a more neutral flavor. Both work beautifully.
-
Texture control: For softer cheese (similar to ricotta), drain for less time. For firmer cheese (like paneer), press the curds longer.
-
Flavor variations: Add herbs, spices, or garlic to the curds before pressing for a gourmet twist.
Serving Ideas
Homemade cheese is wonderfully versatile. Here are some ways to enjoy it:
-
In curries: Cubes of pressed cheese are perfect for Indian-style curries such as paneer butter masala or palak paneer.
-
On salads: Crumble the cheese over fresh greens, tomatoes, and cucumbers for a refreshing salad.
-
As a snack: Spread soft cheese on toast, drizzle with olive oil, and sprinkle with herbs.
-
In baking: Use as a filling for pastries, stuffed bread, or lasagna.
Why Make Cheese at Home?
Making cheese at home is not just about saving money, though it is often cheaper than store-bought options. It is also about knowing exactly what goes into your food—no preservatives, no artificial additives, just pure, wholesome ingredients. The process is both fun and rewarding, offering a hands-on way to connect with a culinary tradition that stretches back thousands of years. Plus, once you master the basics, you can experiment with different techniques and recipes, eventually exploring harder cheeses or flavored varieties.
Final Thoughts
Homemade cheese is proof that great food doesn’t have to be complicated. With just milk and an acid, you can create a fresh, delicious cheese that adds richness to countless dishes. Whether you enjoy it cubed in a curry, crumbled over a salad, or pressed into a snack, this simple recipe delivers comfort and satisfaction. Once you’ve tried it, you may never look at store-bought cheese the same way again.
