Baked Crack Chicken is an irresistibly creamy, cheesy, and savory dish loaded with flavors that combine perfectly for an easy yet indulgent meal. Whether you’re hosting a dinner or simply craving comfort food, this recipe is sure to be a hit.
What is Crack Chicken?
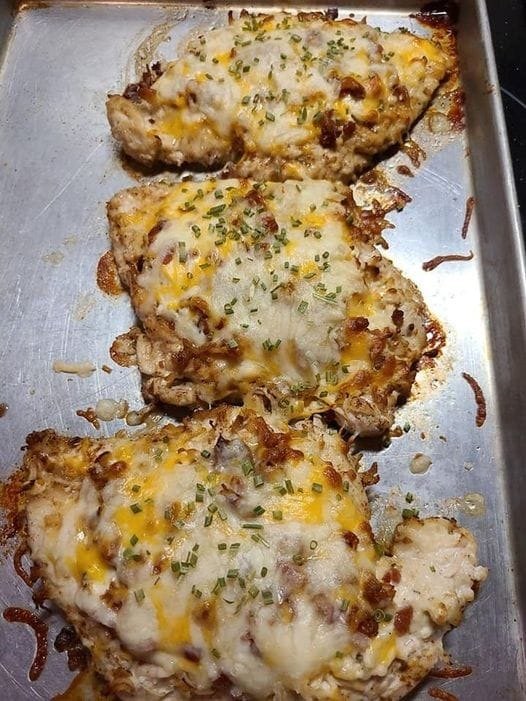
The name “Crack Chicken” might sound unusual, but it refers to how addictive this dish can be! It’s packed with ingredients that are hard to resist: juicy chicken breasts, tangy cream cheese, sharp cheddar, and crispy bacon. The dish is usually seasoned with a ranch dressing mix, which brings a zesty and herbaceous flavor, rounding everything off to create a hearty, savory, and creamy meal. It’s baked to perfection, with a golden top layer of cheese and a rich, creamy sauce enveloping the chicken.
Ingredients
To prepare Baked Crack Chicken, you’ll need the following:
- 4 boneless, skinless chicken breasts
- 8 oz. cream cheese (softened)
- 1 packet ranch dressing mix (about 1 oz.)
- 1 ½ cups shredded cheddar cheese
- 8 slices cooked bacon (crumbled)
- ½ cup green onions (chopped)
- Salt and pepper to taste
- Fresh parsley for garnish (optional)
Step-by-Step Instructions
1. Preheat the Oven
Start by preheating your oven to 375°F (190°C). While the oven is heating up, prepare your ingredients.
2. Prepare the Chicken
Season the chicken breasts with a pinch of salt and pepper on both sides. If you want an extra layer of flavor, you can add a sprinkle of garlic powder or paprika. Arrange the seasoned chicken breasts in a baking dish.
3. Make the Creamy Ranch Mixture
In a medium bowl, combine the softened cream cheese and ranch dressing mix. Stir until smooth and creamy. This mixture is the base of the dish’s indulgent sauce, with the ranch mix adding a signature tangy flavor that balances the richness of the cream cheese.
4. Top the Chicken
Spread the cream cheese mixture evenly over the top of the chicken breasts. This ensures that every bite of chicken will be flavorful and moist. Once the chicken is coated, sprinkle shredded cheddar cheese generously over the cream cheese layer. The cheddar will melt as it bakes, creating a gooey, cheesy blanket over the chicken.
5. Bake
Cover the baking dish with aluminum foil and place it in the preheated oven. Bake for about 20 minutes. After 20 minutes, remove the foil and continue baking for another 10-15 minutes, or until the chicken is cooked through (165°F internal temperature). The cheese should be bubbly and slightly golden on top.
6. Add the Bacon and Green Onions
While the chicken is baking, cook your bacon until crispy, and crumble it into bite-sized pieces. Once the chicken is fully cooked, remove it from the oven and immediately top it with the crumbled bacon and chopped green onions. The warm chicken will soak up the smoky flavor of the bacon, while the green onions add a fresh pop of flavor and color.
7. Serve and Enjoy
Let the Baked Crack Chicken rest for a few minutes before serving. This gives the sauce time to thicken slightly, ensuring every bite is rich and creamy. Garnish with chopped fresh parsley if you like, adding a fresh and vibrant touch. Serve the chicken alongside rice, mashed potatoes, or a simple green salad for a well-rounded meal.
Why Everyone Loves It
Baked Crack Chicken is an instant crowd-pleaser. The combination of creamy ranch, melted cheddar, and crispy bacon creates a symphony of flavors and textures that are simply irresistible. The chicken stays juicy, thanks to the creamy sauce, and the addition of bacon gives it a smoky crunch that contrasts perfectly with the soft, cheesy topping.
It’s also an incredibly versatile dish. You can modify the ingredients to suit your preferences—swap out cheddar for mozzarella, add a dash of hot sauce for some heat, or use turkey bacon for a lighter option. It’s also low-carb and keto-friendly, making it a great option for those following a low-carb diet.
Whether you’re meal-prepping for the week or cooking for a family gathering, Baked Crack Chicken is a surefire way to satisfy everyone at the table!
